I have become increasingly conscious that the vast majority of my structured training comes from Peloton classes. They are excellent workouts, but they are not designed specifically around obstacle course racing, endurance events or the challenges I am preparing for.
So this is the first of the Tough Smudge Training Programmes.
Over the coming months, as I prepare for what will quite obviously be the first, and probably smallest, Tough Smudge Challenge, World’s Toughest Mudder, I am going to build a more structured training programme around the demands of OCR and endurance racing.
I’m starting with my core. It is probably also the part of my body that changed the most during my weight loss, and developing strength, stability and control through the trunk should help with everything from running and carrying to crawling, climbing and negotiating obstacles while fatigued.
Cycle 1 is the foundation. The emphasis is not on doing hundreds of sit-ups or chasing exhaustion. It is about learning the movements, building control and developing a core that can resist movement as well as create it.
Training plan
Common format
Allow approximately 2 minutes to get moving, then perform the five exercises in each workout as a circuit.
Week 1: 2 rounds
Weeks 2–4: 3 rounds
Take roughly 10–20 seconds between exercises while changing position or equipment, and approximately 45 seconds between complete rounds.
The complete workout should take approximately:
Week 1: 12–15 minutes
Weeks 2–4: 16–20 minutes
The aim is controlled, deliberate movement. Don’t rush the exercises simply because they are being performed as a circuit.
Weekly schedule
There are three main workouts: Core A, Core B and Core C. Each is completed once per week, with recovery or short activation sessions between them.
The training days alternate between weeks. Weeks 1 and 3 use Monday, Wednesday and Friday, while Weeks 2 and 4 use Tuesday, Thursday and Saturday. This keeps the programme at three proper core sessions each week without turning core training into an everyday high-intensity workout.
| WEEK 1 LEARN | WEEK 2 ADD VOLUME | WEEK 3 PROGRESS SELECTIVELY | WEEK 4 CONSOLIDATE | |
|---|---|---|---|---|
| MONDAY | Core A: Brace & Stability | 5-minute activation | Core A: Brace & Stability | 5-minute activation |
| TUESDAY | 5-minute activation | Core A: Brace & Stability | 5-minute activation | Core A: Brace & Stability |
| WEDNESDAY | Core B: Loaded & Functional | — | Core B: Loaded & Functional | — |
| THURSDAY | — | Core B: Loaded & Functional | — | Core B: Loaded & Functional |
| FRIDAY | Core C: OCR & Instability | — | Core C: OCR & Instability | — |
| SATURDAY | — | Core C: OCR & Instability | — | Core C: OCR & Instability |
| SUNDAY | Recovery / optional activation | Recovery / optional activation | Recovery / optional activation | Recovery / optional activation |
| ROUNDS | 2 rounds | 3 rounds | 3 rounds | 3 rounds |
Week 1: Learn
2 rounds.
The objective this week is to learn the movements and find the appropriate exercise variations and weights.
Technique comes first. Finish each exercise knowing that you could have done a little more.
Week 2: Add volume
Move to 3 rounds.
Keep the exercises, repetitions and weights largely unchanged. Simply adding the third round already represents a significant increase in total work.
Week 3: Progress selectively
Where an exercise now feels comfortable, choose one progression. For example:
- increase 6 repetitions to 8;
- increase a 20-second hold to 25–30 seconds;
- use the next dumbbell or kettlebell weight;
- increase the range of movement; or
- use a slightly more demanding exercise variation.
Don’t increase everything simultaneously. The objective is controlled progression, not simply making every exercise harder at once.
Week 4: Consolidate
Complete 3 good rounds and concentrate on executing the movements well.
Aim for approximately RPE 7–8/10 towards the end of the more difficult exercises. The work should feel challenging, but technique should remain controlled.
The objective is not to finish every session collapsed on the mat. This cycle is about developing repeatable strength and control that can be progressed again in Cycle 2.
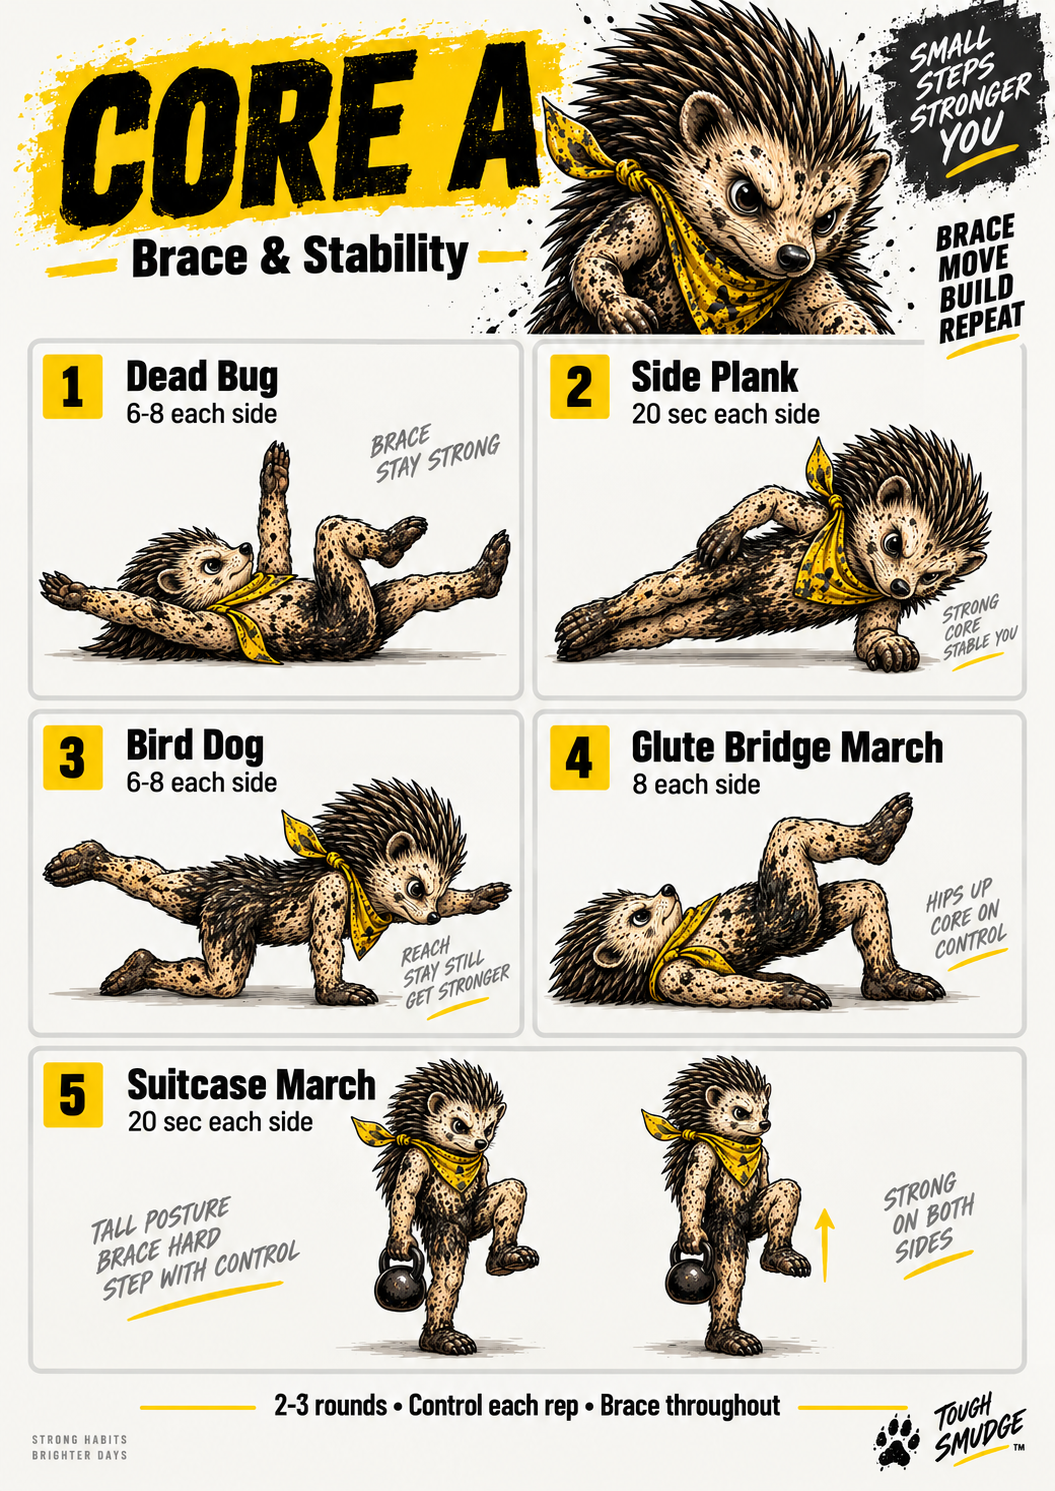
Core A: Brace & Stability
Core A is the foundation workout. The emphasis is on bracing, resisting unwanted movement and keeping the pelvis and trunk controlled while the arms and legs are moving.
| EXERCISE | REPS | PURPOSE |
|---|---|---|
| Dead bug | 6–8 each side | Anti-extension and coordination |
| Side plank | 20 seconds each side | Lateral trunk stability |
| Bird dog | 6–8 each side | Anti-rotation and posterior core |
| Glute bridge march | 8 each side | Pelvic stability |
| Suitcase march with kettlebell or dumbbell | 20 seconds each side | Anti-lateral flexion and loaded stability |
Dead bug
Lie on the mat with your hips and knees at roughly 90 degrees and your arms pointing upwards.
Slowly extend the opposite arm and leg while maintaining contact between your lower back and the mat.
The objective is not how far you can move your limbs. The objective is keeping the pelvis and spine controlled throughout the movement.
Side plank
Start with whichever variation allows you to maintain good form.
Knees bent → straight legs → feet stacked → loaded variation.
Twenty controlled seconds is considerably more useful than a 60-second plank where the hips gradually collapse.
Bird dog
Start on your hands and knees, then extend the opposite arm and leg.
Pause briefly at full extension without allowing the pelvis to rotate.
Think: long body, quiet torso.
Glute bridge march
Raise into a glute bridge, brace the trunk, then alternately lift one foot slightly from the floor.
Your pelvis should barely move.
This has obvious relevance to running because the trunk and pelvis must remain stable as support repeatedly transfers from one leg to the other.
Suitcase march
This is one of the movements that should become particularly useful for Tough Mudder and obstacle racing.
Hold the kettlebell or one dumbbell on one side only and march slowly on the spot.
Do not lean towards or away from the weight.
Your body wants to bend. Your job is to say no.
That is core training.
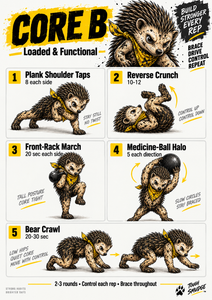
Core B: Loaded & Functional
Core B adds movement and external load. The challenge is to maintain control while the body is moving, carrying weight or working through positions that begin to resemble crawling and obstacle movement.
| EXERCISE | REPS | PURPOSE |
|---|---|---|
| Plank shoulder taps | 8 each side | Anti-rotation |
| Reverse crunch | 10–12 | Controlled trunk and pelvic flexion |
| Front-rack march | 20 seconds each side | Loaded bracing |
| Medicine-ball halo | 5 each direction | Bracing through a changing load |
| Bear crawl | 20–30 seconds | Integrated trunk, shoulder and hip stability |
Plank shoulder taps
Start with a relatively wide foot position.
From a high plank, lift one hand and touch the opposite shoulder.
The objective isn’t speed. Imagine there is a glass of water sitting on your lower back.
Don’t spill it.
The movement starts to become particularly relevant to crawling and unstable obstacle positions because the trunk must remain controlled while one point of support is removed.
Reverse crunch
Lie on the mat or bench with your knees bent and curl the pelvis towards the ribs.
Avoid simply swinging the legs.
Controlled up. Controlled down.
Front-rack march
Hold a kettlebell or dumbbell at one shoulder and march slowly on the spot.
The position changes the challenge compared with the suitcase march because the load is higher and further forward.
Keep the trunk braced and avoid leaning.
Medicine-ball halo
Start with the light medicine ball.
Pass it slowly around your head while keeping the torso as still as possible.
Complete five rotations clockwise and five anticlockwise.
You should feel the trunk resisting the changing position of the load rather than following it.
Bear crawl
Crawl forwards and backwards if you have enough room.
If space is restricted, use controlled bear-plank movements on the spot.
Keep the knees just clear of the floor and try to keep the hips relatively quiet.
This is particularly relevant to OCR because crawling under obstacles while already fatigued is very different from performing an isolated abdominal exercise on a mat.
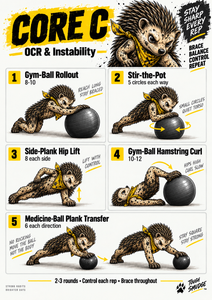
Core C: OCR & Instability
Core C introduces the gym ball and greater instability. The aim is not instability for its own sake, but learning to keep the trunk controlled while the surface or load is moving underneath you.
| EXERCISE | REPS | PURPOSE |
|---|---|---|
| Gym-ball rollout | 8–10 | Anti-extension |
| Gym-ball stir-the-pot | 5 circles each way | Multi-directional stability |
| Side-plank hip lift | 8 each side | Lateral endurance |
| Gym-ball hamstring curl | 10–12 | Posterior chain and trunk stability |
| Medicine-ball plank transfer | 6 each direction | Anti-rotation under movement |
Gym-ball rollout
Kneel behind the ball with your forearms resting on it.
Slowly allow the ball to travel forwards, then pull yourself back to the starting position.
Do not allow the lower back to sag.
Initially the range of movement may be small. That’s fine. Range can increase as control improves.
Stir-the-pot
Place your forearms on the gym ball in a plank position and make small, controlled circles.
Complete five clockwise and five anticlockwise.
Start with small circles. Progress by making the circles larger rather than simply moving faster.
Side-plank hip lift
From a side-plank position, slowly lower and raise the hip while maintaining control.
This adds dynamic movement while still demanding lateral trunk stability.
Gym-ball hamstring curl
Lie on your back with your heels on the ball.
Raise the hips, pull the ball towards you using your heels, then straighten the legs again under control.
The hamstrings and glutes are working, but the trunk must maintain the bridge throughout. It is a good example of why core training means considerably more than simply training the abdominal muscles.
Medicine-ball plank transfer
Start in a high plank with the medicine ball beside one hand.
Slowly move or roll the ball underneath you towards the opposite side, then change hands.
The body should remain as stationary as possible.
Your limbs are moving. Your trunk isn’t.
That is exactly the principle this exercise is designed to train.
TOUGH SMUDGE CORE WALLCHARTS
The three Cycle 1 workouts are also available below as quick-reference wallcharts. I use these in the gym so that the session can be followed without continually checking the full training guide.
What happens after Cycle 1?
Cycle 1 lasts four weeks. Once it is complete, the intention is not simply to abandon these exercises and start again from scratch.
Cycle 2 will build on this foundation by increasing load, range, duration or exercise difficulty while retaining the same underlying principles: brace, control, resist movement and build a core that works as part of the whole body.
This is the start of the Tough Smudge Core Programme. The test will not be how many crunches I can do. The test is whether the work makes me stronger, more stable and more capable when the obstacles, miles and fatigue start adding up.
This is the training programme I am developing and following as part of my own preparation for obstacle course and endurance events. It is not personalised fitness or medical advice. Exercise should be adapted to your own ability and circumstances, and any movement causing pain should be stopped.